Showing posts with label Linda's kitchen. Show all posts

Monday, December 14, 2009

Linda's Kitchen: There's light at the end of the tunnel


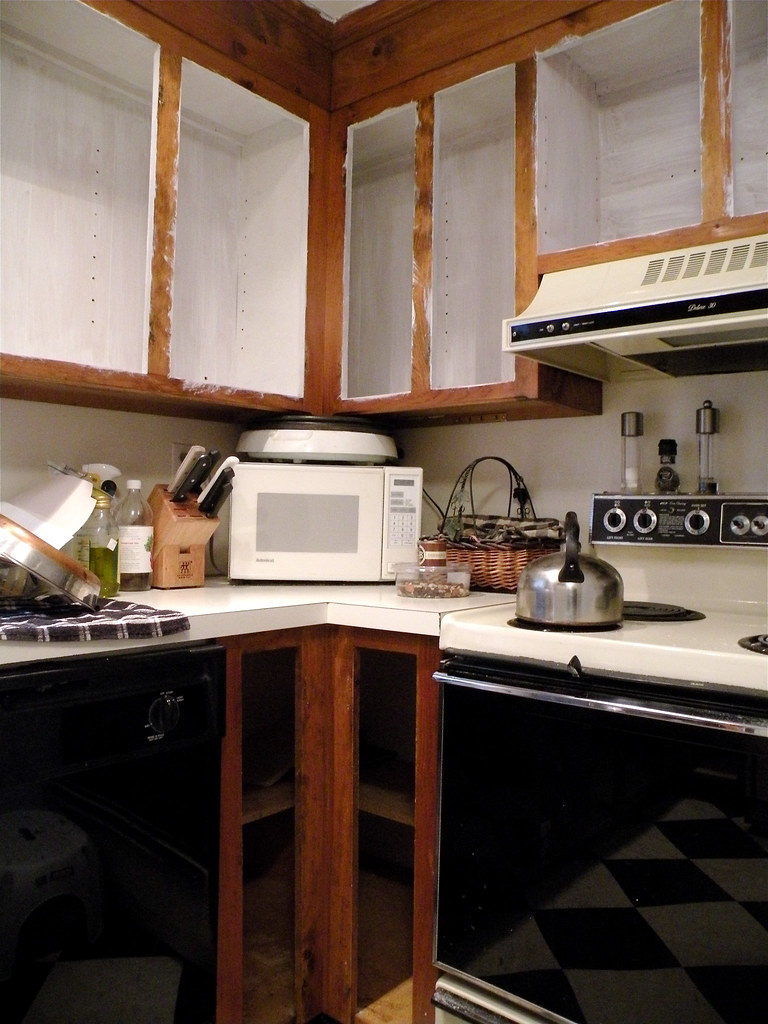
Once upon a time, my kitchen was a dated, tiny space with nasty knotty pine cabinets and twenty-five year old appliances.


As a featured piece of my blogging relationship with New England Home magazine, my planned kitchen facelift took on a larger scale. Instead of just painting the cabinets and walls, the popcorn ceiling was scraped off, recessed lighting was installed and beadboard was put up .

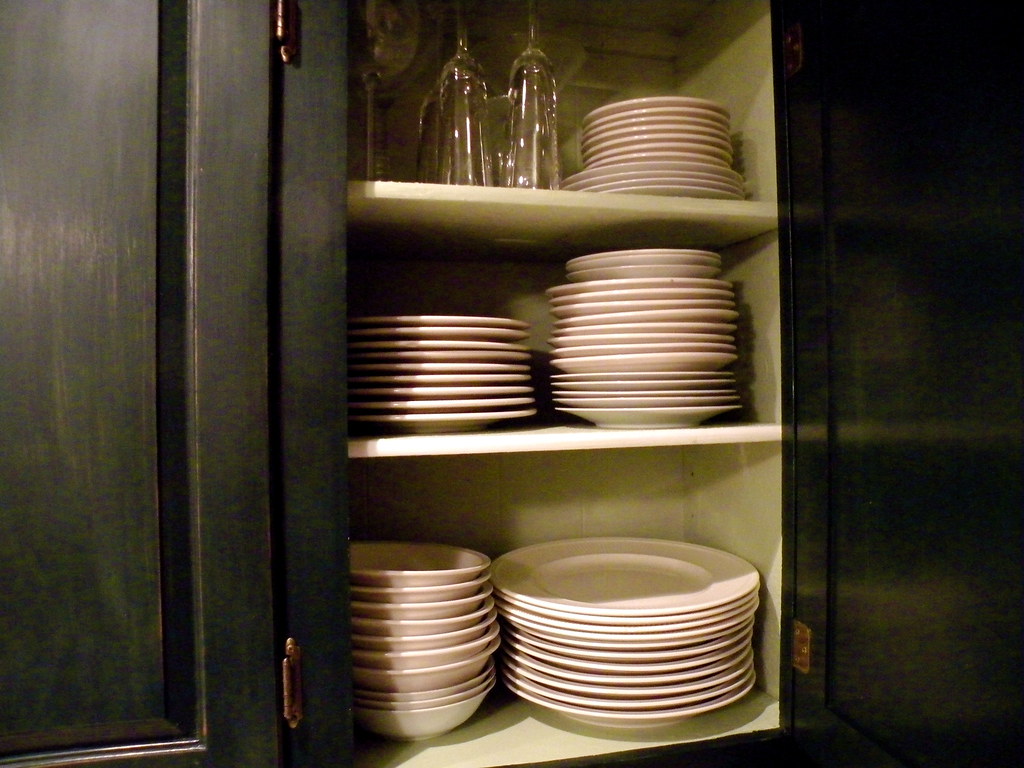
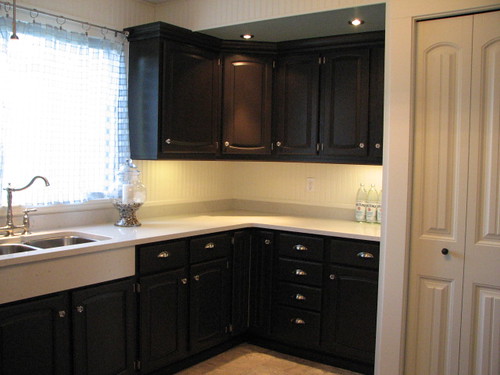
The cabinets were fully painted inside (Farrow & Ball: Cooking Apple Green) and out (Ben Moore: Black Forest Green).


Ferguson Appliance was the source for the beautiful kitchen appliances. My contact, Paul Gillis, in their Franklin, MA showroom was great to work with. We discussed my needs, space restrictions and budget and he put together a group of appliances that fit the bill and made all the arrangements for delivery and installation.

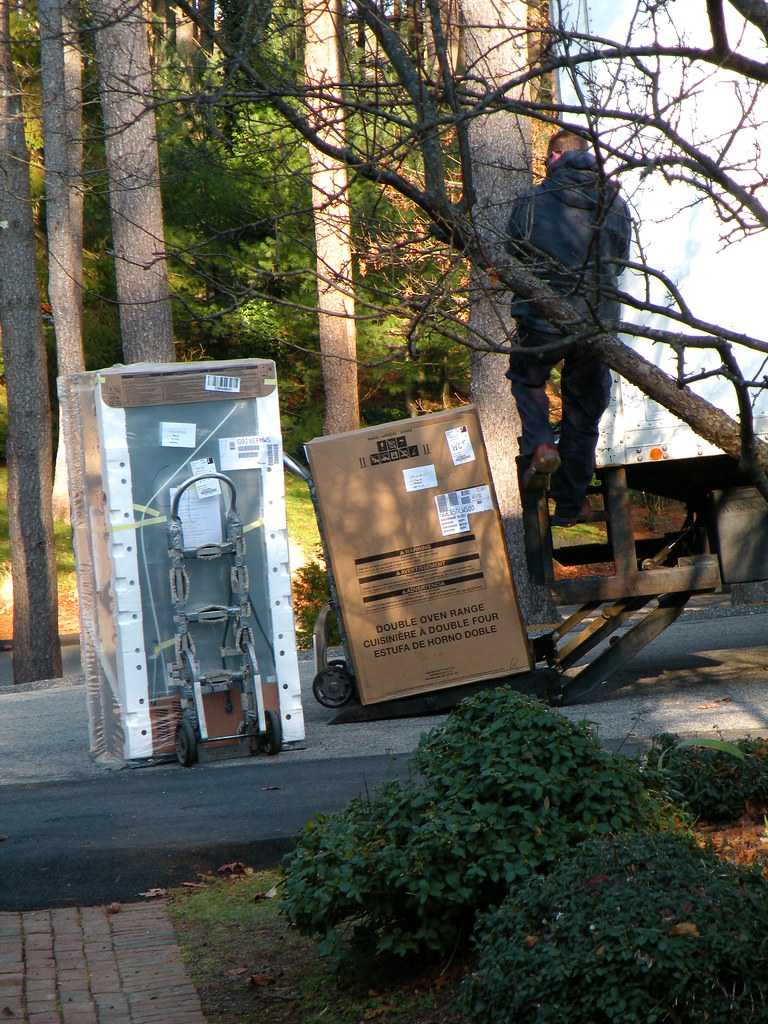
On delivery day, all I needed to do was prop open the door.


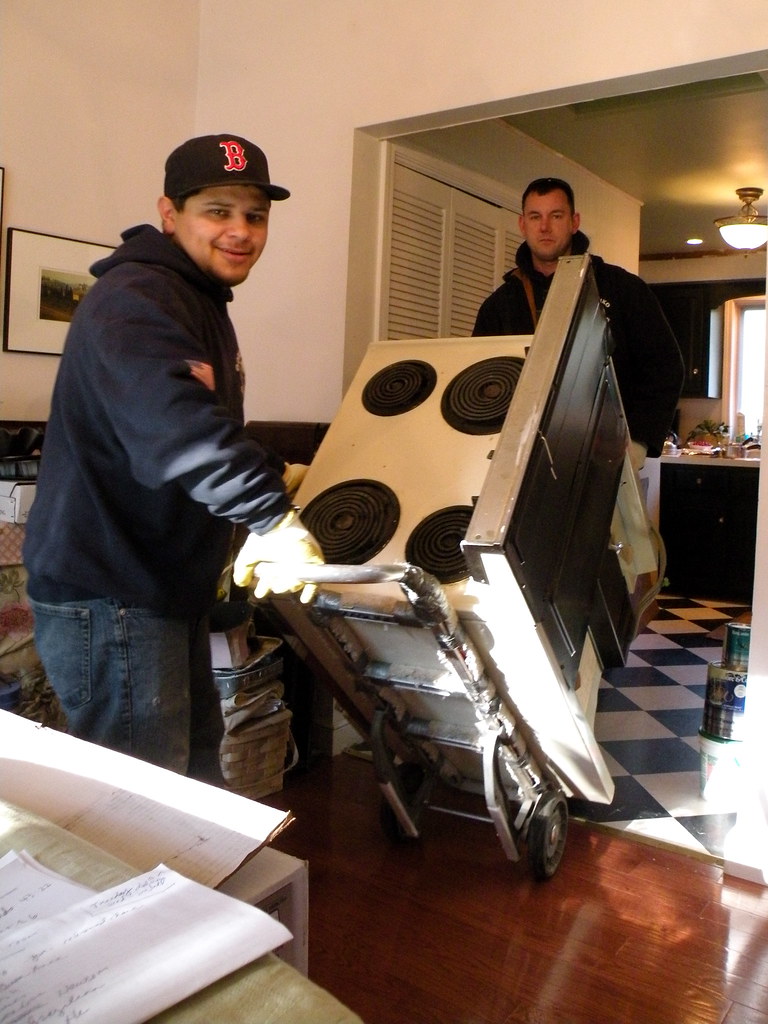
The very nice and professional delivery guys from Ferguson taking away my old stove. It served its purpose for twenty-five years and two owners so I'd say it didn't owe me anything. I am, however, looking forward to not burning things because it was running hot.
 

The next day, Ferguson's installer Tim came out and hooked up all the new appliances.  Again, he was so professional and nice to be around.

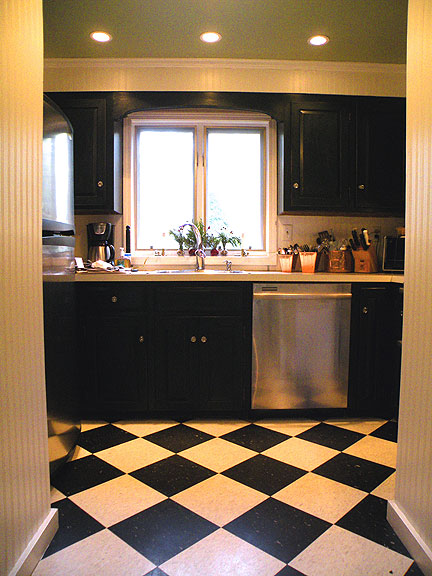
And so, I now have all new Whirlpool appliances - refrigerator, dishwasher and double oven range. I feel like I've died and gone to Julia Child's heaven.


On the work front, there is still quite a lot of work to be done. The soffit over the cabinets has been beadboarded and painted to match the walls and back splash. I still need to paint the undersides of the cabinets, sew the roman shade for the window, frame out the door way and, finally, build the new counter top with undercounter storage that is going along the long entry wall into the kitchen.


But, first, I have a lot of Christmas cookies to bake. Let the entertaining begin!


 Subscribe to ::Surroundings::

Linda's Kitchen: There's light at the end of the tunnel


Once upon a time, my kitchen was a dated, tiny space with nasty knotty pine cabinets and twenty-five year old appliances.


As a featured piece of my blogging relationship with New England Home magazine, my planned kitchen facelift took on a larger scale. Instead of just painting the cabinets and walls, the popcorn ceiling was scraped off, recessed lighting was installed and beadboard was put up .

The cabinets were fully painted inside (Farrow & Ball: Cooking Apple Green) and out (Ben Moore: Black Forest Green).


Ferguson Appliance was the source for the beautiful kitchen appliances. My contact, Paul Gillis, in their Franklin, MA showroom was great to work with. We discussed my needs, space restrictions and budget and he put together a group of appliances that fit the bill and made all the arrangements for delivery and installation.

On delivery day, all I needed to do was prop open the door.


The very nice and professional delivery guys from Ferguson taking away my old stove. It served its purpose for twenty-five years and two owners so I'd say it didn't owe me anything. I am, however, looking forward to not burning things because it was running hot.
 

The next day, Ferguson's installer Tim came out and hooked up all the new appliances.  Again, he was so professional and nice to be around.

And so, I now have all new Whirlpool appliances - refrigerator, dishwasher and double oven range. I feel like I've died and gone to Julia Child's heaven.


On the work front, there is still quite a lot of work to be done. The soffit over the cabinets has been beadboarded and painted to match the walls and back splash. I still need to paint the undersides of the cabinets, sew the roman shade for the window, frame out the door way and, finally, build the new counter top with undercounter storage that is going along the long entry wall into the kitchen.


But, first, I have a lot of Christmas cookies to bake. Let the entertaining begin!


 Subscribe to ::Surroundings::

Monday, November 30, 2009

Linda's Kitchen: The Backsplash


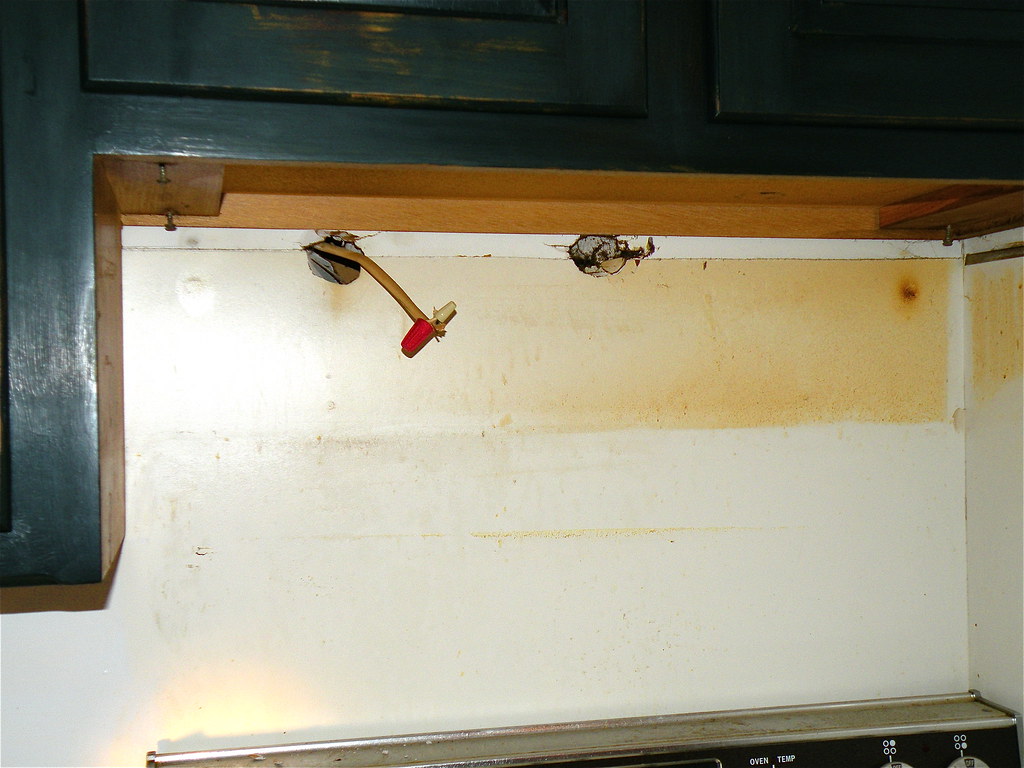
And so, the kitchen makeover is slowly heading towards the final stages. The big work this weekend was to put up the bead board backsplash and on the soffit above the cabinets. The nasty part of the job was that we pulled out the 25 year old exhaust hood over the stove and pulled out the stove so we could clean behind it. Well, it wasn't as bad as I feared, but it wasn't great either. Am hoping to have the new appliances in shortly and so the time had come to face the dust and grime of many years.


After much debate about what to do with the backsplash, I decided to stick with the beadboard motif that I started on the side walls. Ultimately, in a small space, I do believe that the fewer mixed elements the better. Between the black and white checkerboard floors and dark cabinets, it seemed that adding a totally different backsplash wasn't the best choice. Also, in all honesty, this is the least expensive option as well. The existing backsplash is the same off-white formica that covers the counters. Unfortunately, the builders ran the backsplash up under the cabinets, so removing it is well neigh impossible.


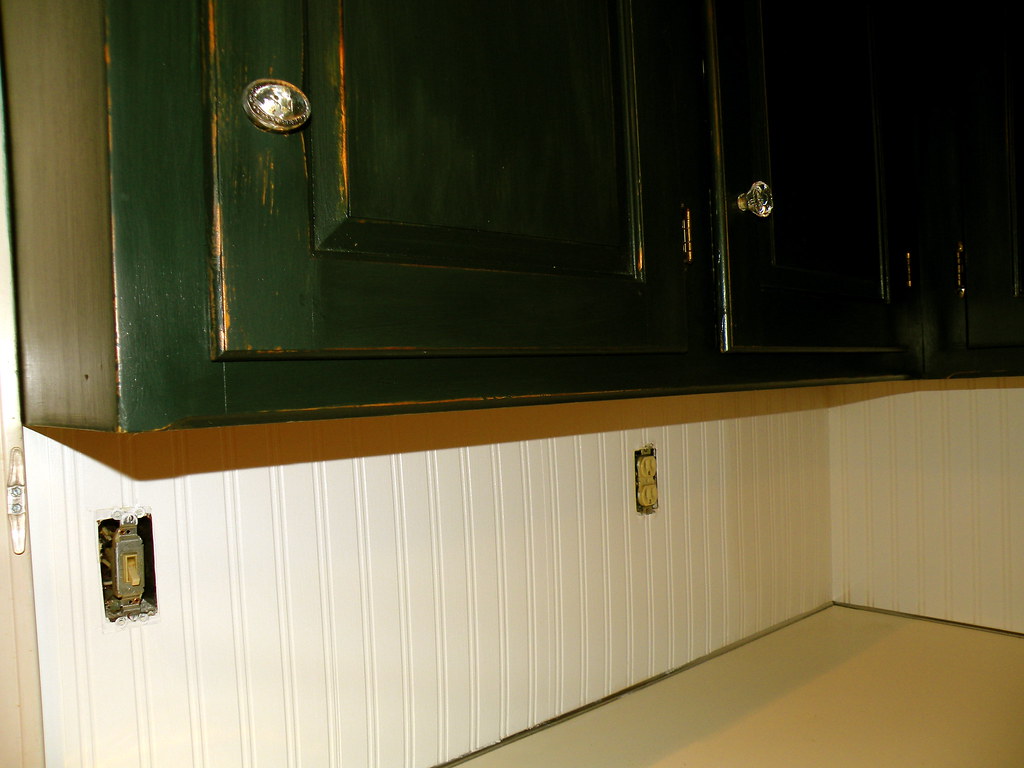
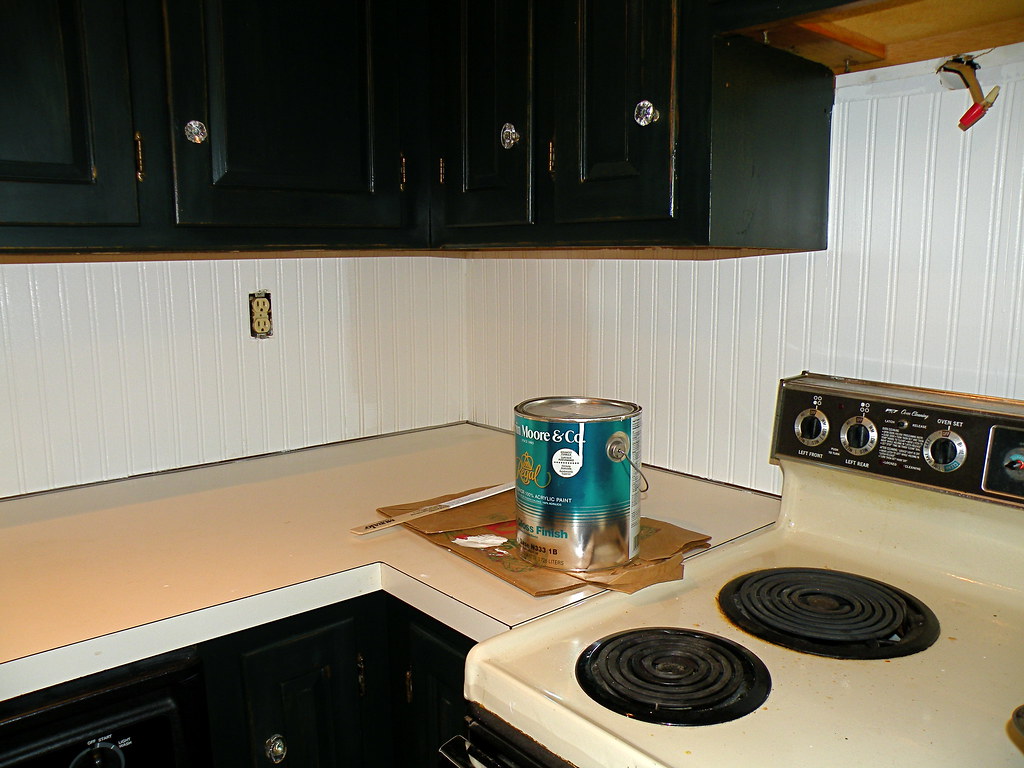
As I've written before, I'm using embossed beadboard wallpaper for this job, which did not stick to the formica, so we had to prime with the trusty Zinsser primer. Same with the wood soffit-it required a coat of primer so the paper would stick. So we spent all Sunday priming, measuring the paper and hanging it. And, I love it. One thing I do like is that the the vertical lines makes the under cabinet space-which is only 15"-seem higher.

I'm now in the process of painting the backsplash, soffit and walls. I'm using Benjamin Moore's Cloud White in a semi-gloss. Now, honestly, it's not hugely different from the actual white beadboard, but as you can see in the photo, there is some difference. The backsplash is painted up to about 10" off the back corner (where my short arms can't reach). The reason I selected this color is that it matches the white Formica counter top, which I can't afford to replace at this time. It was important that the walls and backsplash color didn't make the counter top seem dingy by comparison. And, I must say that I really like the light counters with the dark cabinets. The final step will be to apply a polyurethane sealer to protect the backsplash from water and staining.


(before the backsplash was installed)

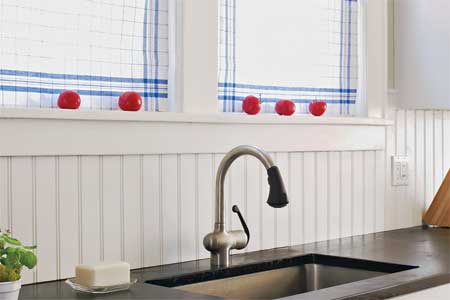
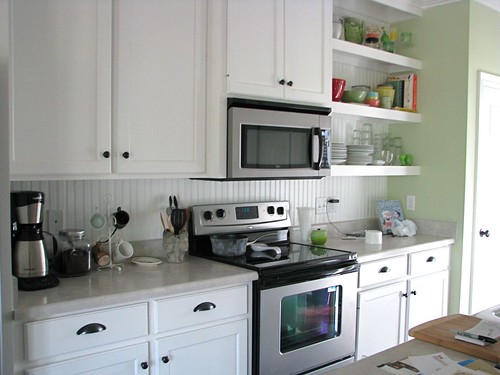
Here's a little collection of inspiration photos:

Image from Better Homes & Gardens via Nest Egg


via Flickr


via Flickr


 Subscribe to ::Surroundings::


Linda's Kitchen: The Backsplash


And so, the kitchen makeover is slowly heading towards the final stages. The big work this weekend was to put up the bead board backsplash and on the soffit above the cabinets. The nasty part of the job was that we pulled out the 25 year old exhaust hood over the stove and pulled out the stove so we could clean behind it. Well, it wasn't as bad as I feared, but it wasn't great either. Am hoping to have the new appliances in shortly and so the time had come to face the dust and grime of many years.


After much debate about what to do with the backsplash, I decided to stick with the beadboard motif that I started on the side walls. Ultimately, in a small space, I do believe that the fewer mixed elements the better. Between the black and white checkerboard floors and dark cabinets, it seemed that adding a totally different backsplash wasn't the best choice. Also, in all honesty, this is the least expensive option as well. The existing backsplash is the same off-white formica that covers the counters. Unfortunately, the builders ran the backsplash up under the cabinets, so removing it is well neigh impossible.


As I've written before, I'm using embossed beadboard wallpaper for this job, which did not stick to the formica, so we had to prime with the trusty Zinsser primer. Same with the wood soffit-it required a coat of primer so the paper would stick. So we spent all Sunday priming, measuring the paper and hanging it. And, I love it. One thing I do like is that the the vertical lines makes the under cabinet space-which is only 15"-seem higher.

I'm now in the process of painting the backsplash, soffit and walls. I'm using Benjamin Moore's Cloud White in a semi-gloss. Now, honestly, it's not hugely different from the actual white beadboard, but as you can see in the photo, there is some difference. The backsplash is painted up to about 10" off the back corner (where my short arms can't reach). The reason I selected this color is that it matches the white Formica counter top, which I can't afford to replace at this time. It was important that the walls and backsplash color didn't make the counter top seem dingy by comparison. And, I must say that I really like the light counters with the dark cabinets. The final step will be to apply a polyurethane sealer to protect the backsplash from water and staining.


(before the backsplash was installed)

Here's a little collection of inspiration photos:

Image from Better Homes & Gardens via Nest Egg


via Flickr


via Flickr


 Subscribe to ::Surroundings::


Thursday, November 19, 2009

Linda's Kitchen: Ahh, the joys of restocked cabinets!


And so, my kitchen cabinets are finally painted (woot!) and I'm no longer picking through grocery bags for food and measuring cups. The joys of clean, organized and freshly painted kitchen cabinets cannot be overstated, let me tell you!

A little recap. My kitchen makeover has been basically a Sunday afternoon project. So, I've we've (can't forget my fantastic volunteer staff!) been working since August.  Here are the nasty knotty pine cabinets that I started off with. Lovely, no?


Lot's of cleaning and priming ensued.


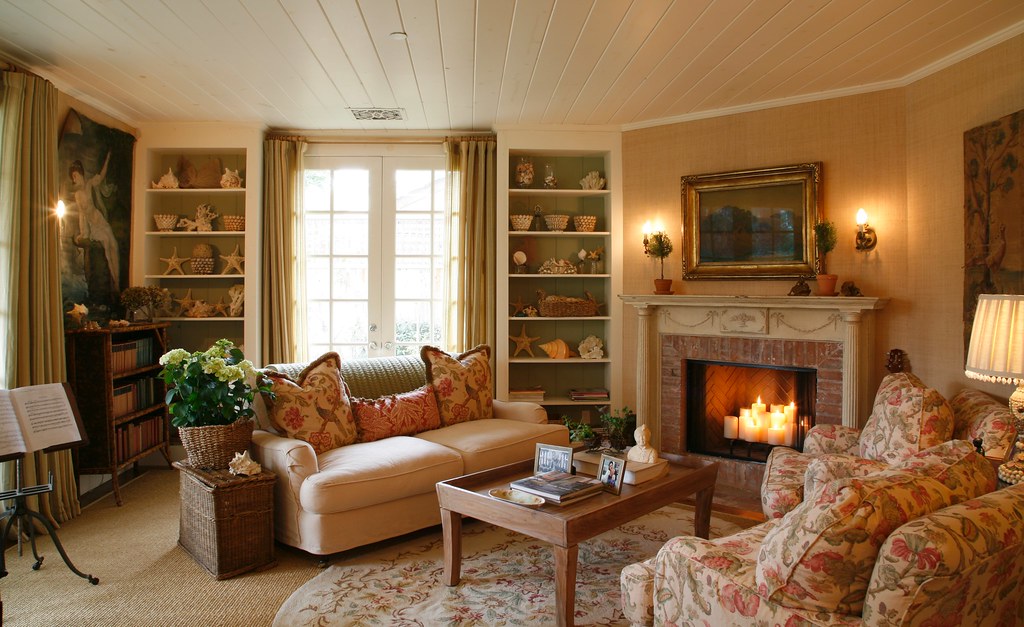
I painted the insides of the cabinets with Farrow & Ball Cooking Apple Green (with thanks to Brooke Giannetti at Velvet & Linen for the inspiration!) This is Brooke's living room below, I just loved the backs of the shelves. She used F&B's Verte de Terre, which I looked at, but eventually I settled on Cooking Apple Green as it was a little less gray.


So, here is a test section of the Cooking Apple Green - which I am totally in love with!!  I also tested the idea of upholstering the shelves in burlap. The main reason (aside from trying something new!) was that the shelves are nasty particle board, which I thought wouldn't take the paint well. The results of the wrapped burlap shelves was mixed - some areas were nice an tight, but other's not so much and the end result wasn't as tailored as I wanted.


I was also thinking I needed to line the cabinet insides with paintable paper - again because of the liberal use of cheap particle board. However, in the end with good priming, they looked best simply painted.


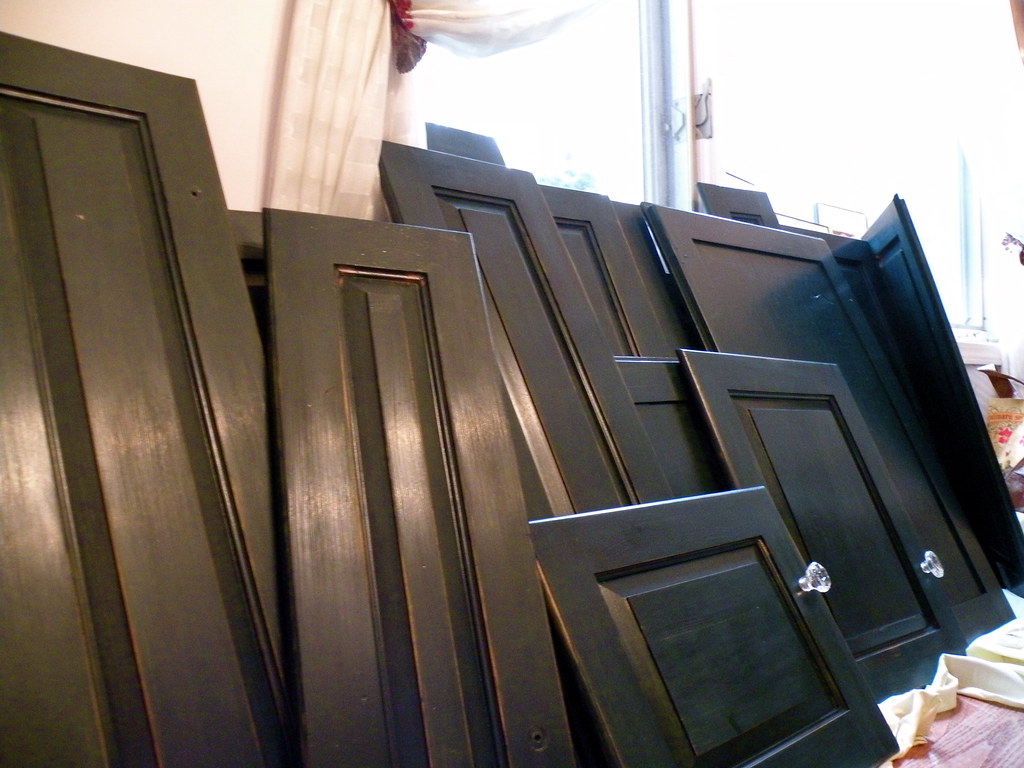
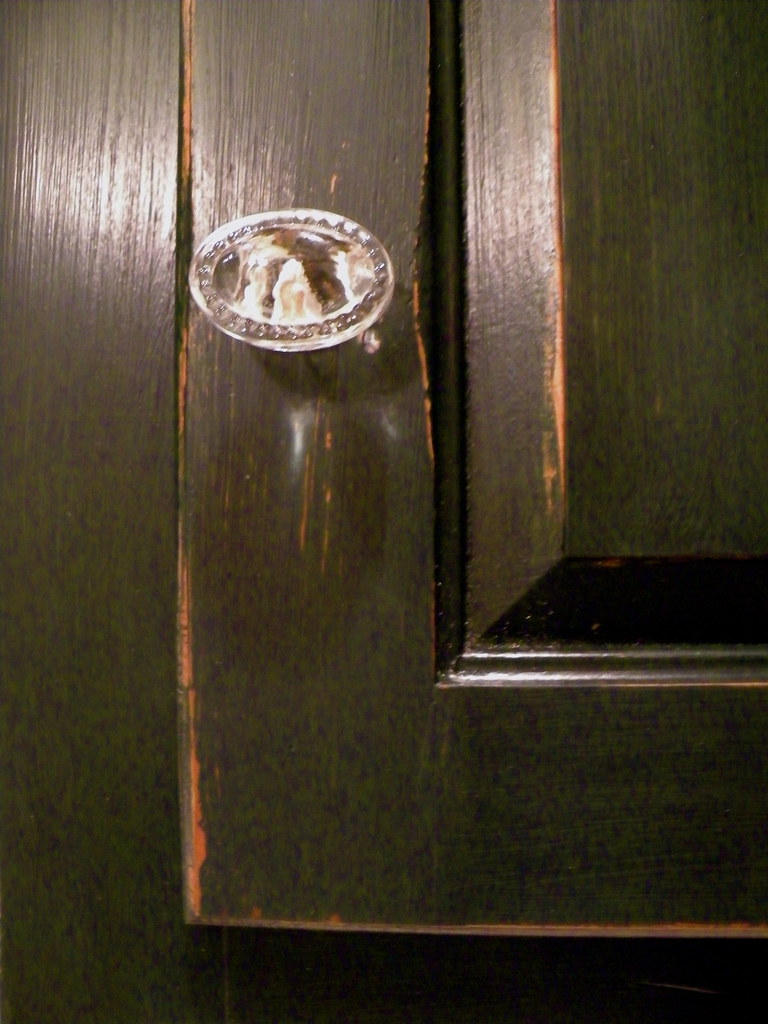
As for the exteriors of the shelves, while I veered wildly back and forth between a black paint or a lighter green, I ended up compromising with myself and went with two Benjamin Moore colors: Essex Green with Black Forest Green as the second coat. Both coats were sanded with a fine steel wool with "holidays" left in the paint to achieve an aged look. I also wanted to keep the shine to a minimum. This paint is an exterior trim paint, so it should stand up well to kitchen wear and tear.


Here are the cabinet doors all finished and lined up waiting to be re-attached to the cabinets! Although I have a very small kitchen, there are still seventeen doors! And only two drawers. Don't ask.

Of course, the final element with the cabinet doors is the hardware. There are so many beautiful choices out there! I decided that with all the work involved in painting the cabinets, they I deserved something special!  After all, my manicure was sacrificed for the cause!!

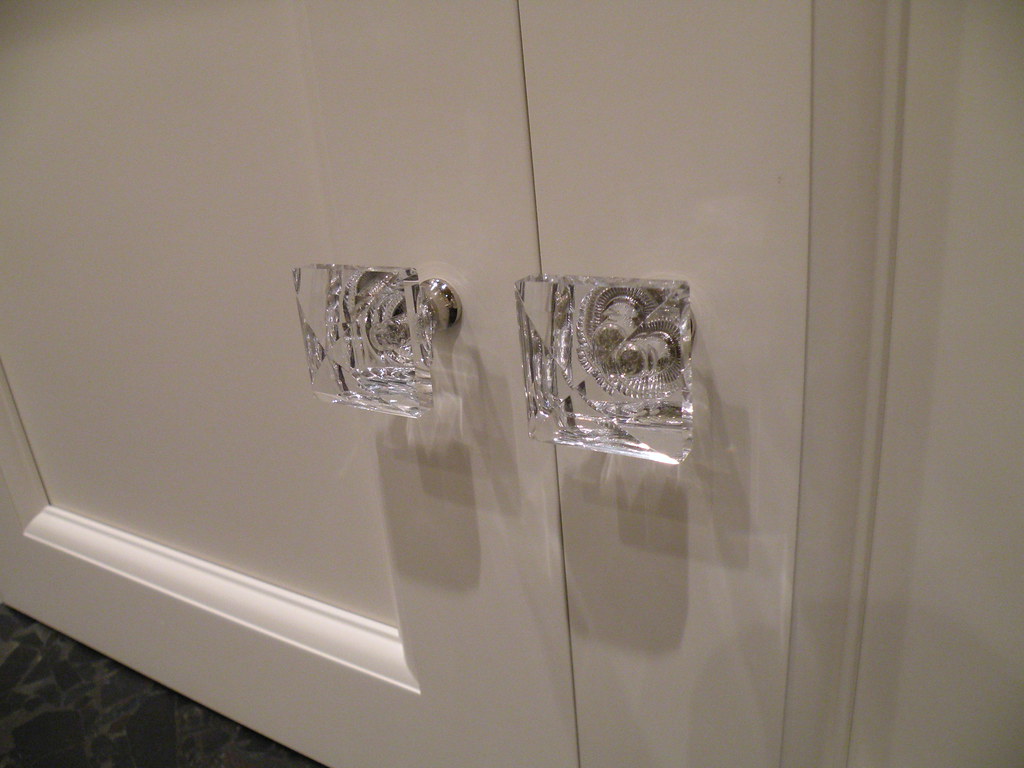
In August, I was at an event at the Roomscapes Luxury Design Center in Rockland, MA (see post here) and fell in love with a set of crystal knobs on display.


I thought that glass knobs were a great idea to add sparkle and lightness to the dark cabinets (not that they look bad on these beautiful cream cabinets either!).  So, I started searching for the perfect knob for my slightly distressed, but not too shabby or 'kountry' kitchen cabinets. Something that bridged the divide between upscale and, well, budget.

There are some seriously beautiful cabinet knobs out there!


Swarovksi "Baldwin" knob - at $38 per knob (on sale). Total for 20 knobs: $760. Considerably more than what I've spent on the kitchen to date. So, nope.


These totally over the top Cache knobs and escutcheon's sport Swarovski crystals and are fabulously jewelry-like. And, honestly, at $30 per set, not bad. But, not the look or price tag I seek.


These Quartz Crystal knobs are pretty, but still, at $20 each, we're looking at $400 for the kitchen. 


These very pretty German Crystal knobs are beautiful and I love the facets - sparkly! Currently priced at $15 each, we're in the $300 range for the knobs. 


These Restoration.com glass knobs are lovely - elegant and simple. At $11.80 each theyre a $230+ budget item.


Vintage inspired "Astoria" knob at $6 each. $180 for entire kitchen.


Of course, glass knobs come in a variety of fabulous colors! These from Looking in the Attic are also about $6-7 per knob. Pretty, but I don't like the visible post.


So many choices, so little budget.  So, of course, when looking for a bargain, I headed over to Ebay and found these pretty little vintage inspired knobs:


Love them, love everything about them. And since I couldn't decide, I picked two different styles and are using them both! Here is a link to the oval knob , unfortunately, I can't find the link to the flower, but it was the same seller. At less than $2 each, the final cost was a trés budget friendly $50 for the whole kitchen, including shipping.


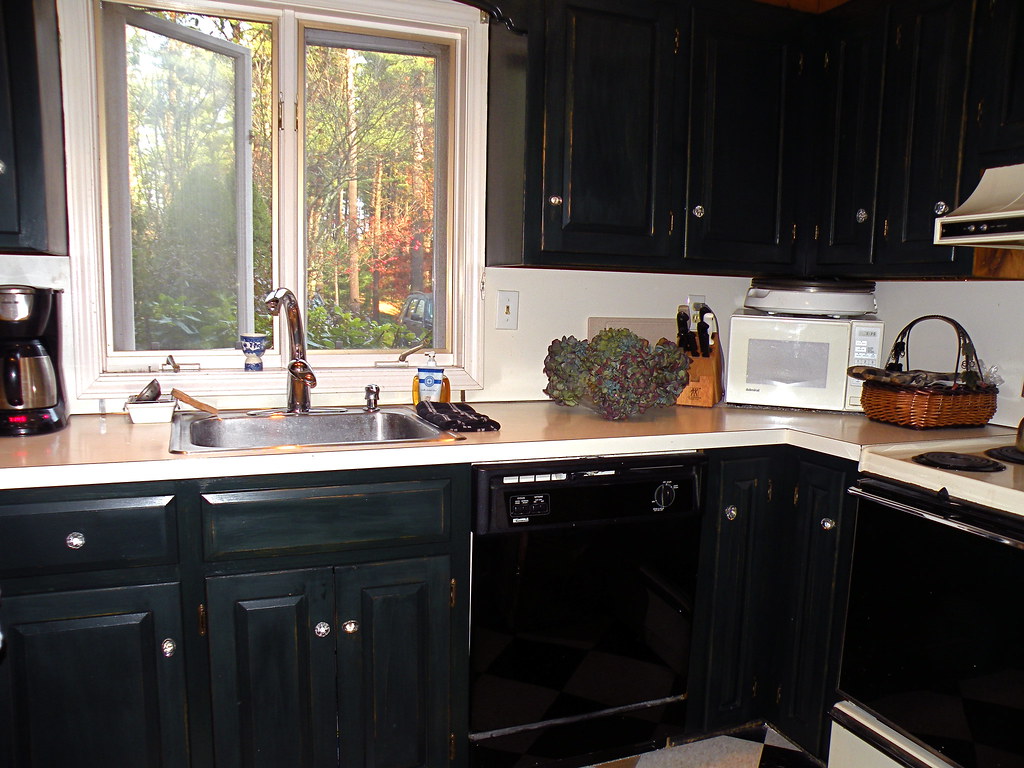
And all put together!


There is still a lot more work to come. The soffit over the cabinets needs to be painted, as do the walls (not shown in pic), and the backsplash needs to be dealt with. And, all new appliances are coming in a couple of weeks, courtesy of Ferguson Appliance.  I think the stainless appliances will be a nice balance against the dark cabinets and I'm looking forward to my checkerboard floor NOT being reflected in the shiny black dishwasher and stove fronts!


 Subscribe to ::Surroundings::